How to – Interactive 3d picture
I wanted to be able to showcase my 3d conversion work directly on my website, so I started to research a technic I’ve seen first on social media, mostly known as the “Facebook 3d photo“.
The goal is to display an image containing depth data that you can inspect on a regular monitor by moving your mouse around, embedded in a web page.
move the mouse to view!
We need to create a little JavaScript application to achieve it, using the open-source JavaScript library PixiJS, for performance and ease of use.
I’m not an expert at web development myself, however, it is assumed that you have some basic knowledge to follow this walkthrough. The post only covers the basics and focus on the integration for my use case: having this technic to work inside my WordPress site. You’ll then can adapt it to your need – I invite you to take a look at the PixiJS starter guide if you are new to it.
PREPARING THE IMAGES
We need a picture and its corresponding “depth map”. I choose one picture from my Altspace photo gallery and create a very quick and simple ‘depth map’ (using LeiaPix online converter tool).


I wont go into the details of the depth map creation process here as its not the main focus of the post, but just keep in mind that the brightest part is the foreground, and the darkest the background.
I name my pictures conveniently, and I upload them to my website’s media gallery.
(WORDPRESS) PREPARE WORDPRESS FOR EMBEDED CODE
(you can obviously skip this part if your site is not using WordPress)
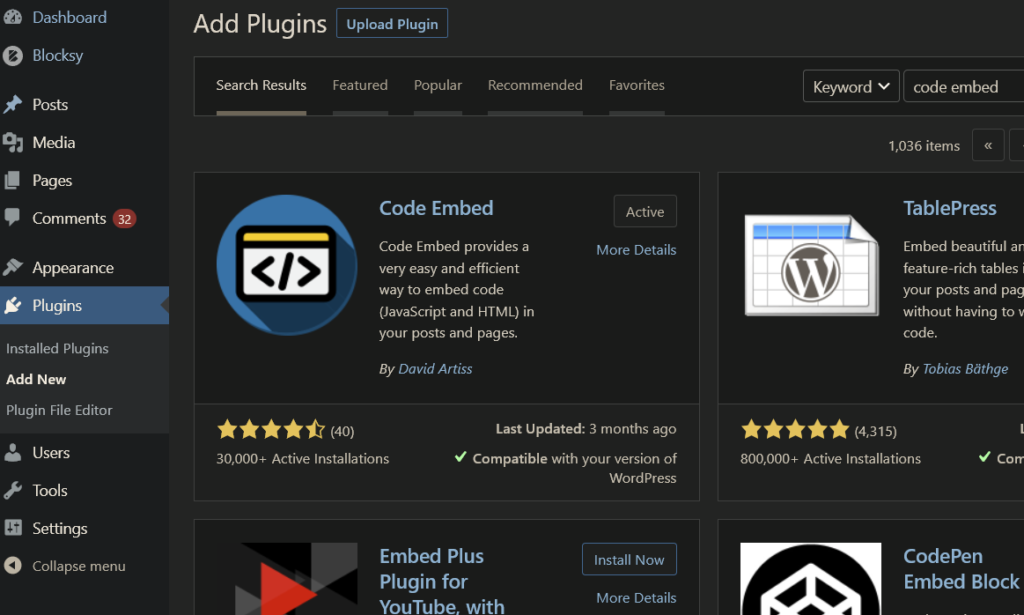
To create the 3D photo effect I need to use javascript code in my post, but WordPress CMS do not allow that by default. So I will be relying on a WordPress plugin called “Code Embed” wich allows to do exactly that.

Download (and activate!) the plugin. Note that it will also be needed to activate the custom fields, it will be covered later.
CODING THE APPLICATION
Its time to create our little Javascript application using PixiJS.
The minimal version of the PixiJS library has been installed at the root of my website.
I’m calling it using: <script src="/pixi.min.js"></script>
You could also use the CDN version: <script src="https://pixijs.download/release/pixi.js"></script>
<body>

        <script src="/pixi.min.js"></script>

        <canvas id="myCanvas" width="600" height="350"
style="border:5px solid #878686; width:600; height:350;">
        <img src="/wp-content/uploads/2022/04/3ds_AltVrHG_RGB.jpg" width="600" height="350" alt=""/>
        </canvas>

        <script>

        // Declare the app:
        let app = new PIXI.Application({width:600, height:350, antialias:true, view:myCanvas});

        // Declare our base image, its dimensions, and add it to the stage:
        let img = new PIXI.Sprite.from("/wp-content/uploads/2022/04/3ds_AltVrHG_RGB.jpg");
        img.width = 600;
        img.height =350;
        app.stage.addChild(img);

        // Create the depthmap the same way, add it to the stage
        depthMap = new PIXI.Sprite.from("/wp-content/uploads/2022/04/3ds_AltVrHG_DEPTH.jpg");
        depthMap.width = 600;
        depthMap.height = 350;
        app.stage.addChild(depthMap);

        // setup a displacement filter based on the depthmap
        displacementFilter = new PIXI.filters.DisplacementFilter(depthMap);
        app.stage.filters = [displacementFilter];

        // create the mouse function ruling the displacement
        window.onmousemove = function(e) {
        displacementFilter.scale.x =
(window.innerWidth / 2 - e.clientX) /50;
        displacementFilter.scale.y =
(window.innerHeight / 2 - e.clientY) /50;
        };

        </script>

    </body>
(WORDPRESS) EMBED THE CODE INTO A BLOCK
Our application is ready but we still have to display it in our post.
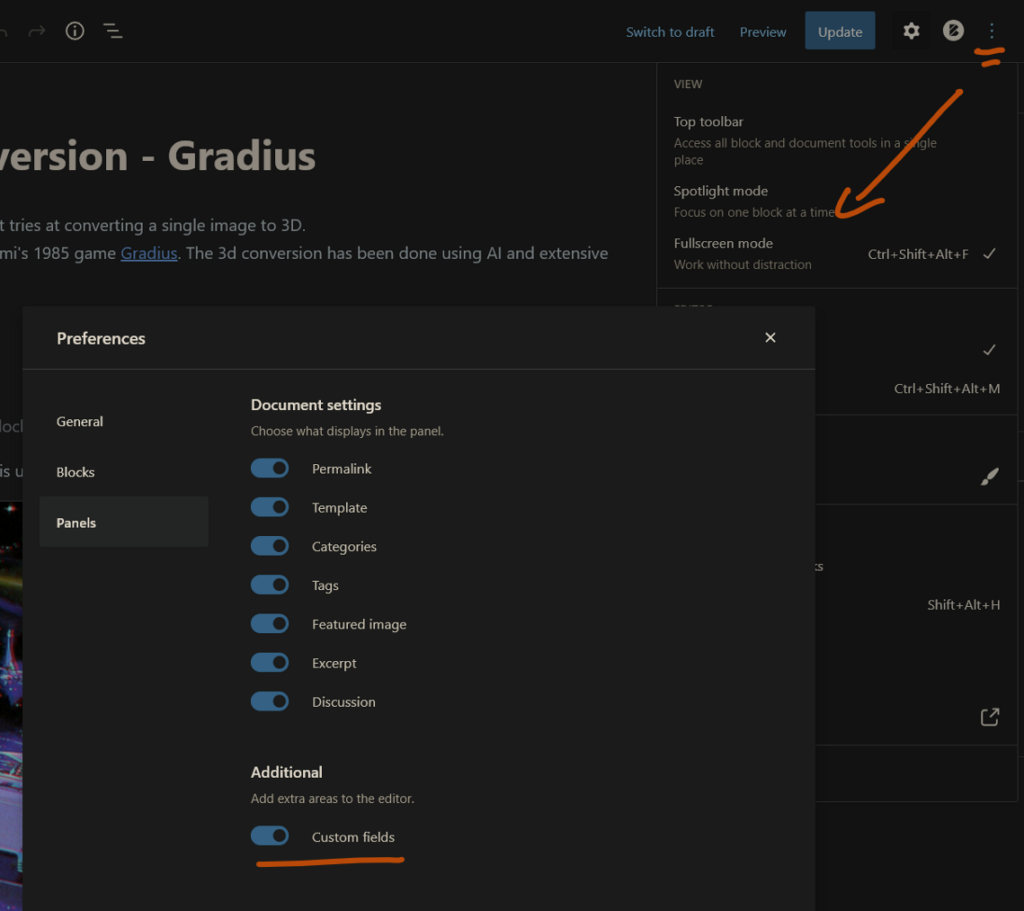
By default custom fields are disabled in WordPress 5.0 and up.
To enable them, go to Options (the three vertical dots on the top right), then Preferences->Panels.

Now the custom field window should appear at the bottom of your dashboard.

Create a new custom field. Past the code into the value window.
There is a naming convention by default your name should start with ‘CODE’ (ie CODE1, CODE2 etc.)
You can double check and change that in the plugin settings:
Dashboard’s main vertical menu->Settings->Code Embed

Finally, call your code in your post using your field name into double brackets like this: {{CODEHowTo3dPic}}
I hope this was usefull to you, have fun!
